Hyundai Kona: Head Up Display System / Head Up Display Unit Repair procedures
| 1. |
Disconnect the negative (-) battery terminal.
|
| 2. |
Remove the instrument cluster.
(Refer to Indicators And Guages - "Instrument Cluster")
|
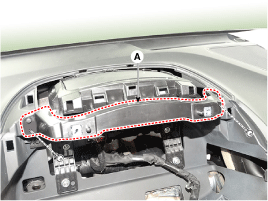
| 3. |
Remove the head up display bezel (A) after loosening the screw.
|
| 4. |
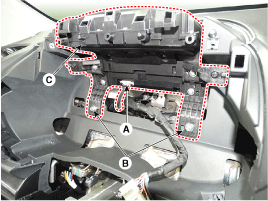
Remove the head up display unit (C) after disconnecting the connector
(A) and remove the mounting bracket (B).
|
| 1. |
Install the head up display unit.
|
| 2. |
Install the head up display unit bracket and instrument cluster.
|
| 3. |
Install the head up display bezel.
|
| 4. |
Connect the negative (-) battery terminal.
|
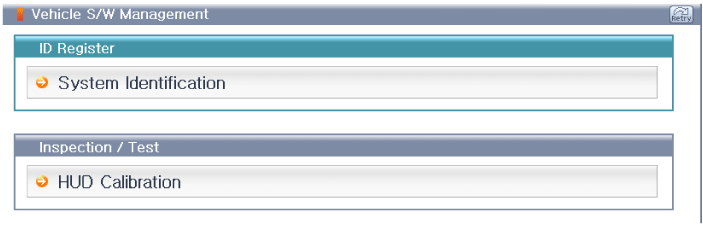
If a part of the headup display footage is distorted or it is not at eye
level with the driver a Global Diagnostic System (GDS) can be used to carry
out calibration.
| 1. |
In case calibration is required
| – |
When replacing the head-up display unit.
|
| – |
In case the footage is distorted after replacing the windshield
(double vision removed after film is inner mounted to the
glass).
|
| – |
When the HUD mounted main crashpad is removed/installed
or replaced.
|
| – |
When the video installation location of the Head-up display
unit is not at eye level of the driver and the focus is
inconsistent.
|
|
| 2. |
calibration items
No
|
Footage calibration functions
|
Calibration cases
|
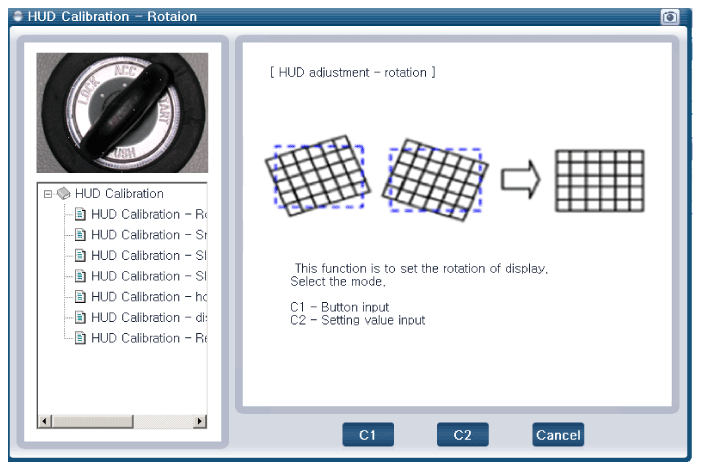
1
|
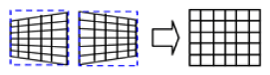
Rotation : Calibration in the half-circle/clockwise direction
based on the center
|
|
2
|
Smile : Calibration based vertically on the center
|
|
3
|
Slanted(up/down) : Calibration according to an upward/downward
slant
|

|
4
|
Slanted(left/right) : Calibration according to a left/right
slant
|
|
5
|
Parallel compensation
|

|
6
|
Move location of mark to upward/downward : Compensation according
to eye height
|

|
7
|
Initialization : Changed to the status of before video compensation
|
|
|
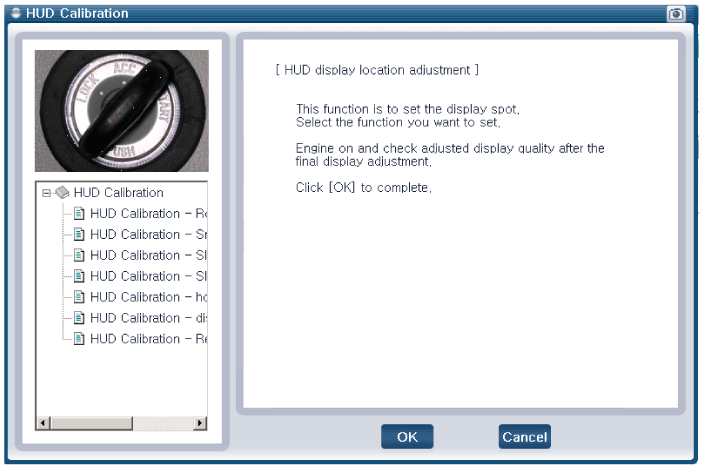
| 3. |
Process of calibration
| (1) |
Locate the vehicle on a flat plane for accurate adjustment.
|
| (2) |
Make sure that there are no foreign materials on the windshield.
|
| (3) |
The service technician will connect the Global Diagnostic
System to the vehicle and select vehicle type and HUD system
additional functions.
|
| (4) |
Under additional functions select 'HUD calibration'.
|
| (5) |
Before 'calibration' carry out 'HUD calibration - initialization.'
|
HUD calibration - initialization' must be performed
first before proceeding to 'calibration'.
|
|
| (6) |
Select the necessary calibration items and carry out 'HUD
calibration'.
|
| (7) |
When calibration is complete start, then cut the engine
and check to see that the footage calibration is complete.
|
|
Troubleshooting
Category
Error symptoms
inspection item
Detailed inspection item
Related parts
...

 Head Up Display Unit Components and components location
 Head Up Display Unit Troubleshooting